S3 Assume Role
This method automatically uses the IAM role attached to your EC2 instance to access S3 buckets. No manual credential entry is required.
Prerequisites
- • Ensure your EC2 instance has an IAM role attached.
- • Verify the instance profile is properly configured via AWS Console under EC2 › Instance Settings › Attach/Replace IAM role.
Updating the Existing IAM Role
Since your EC2 instance already has an IAM role attached, you need to update it with the necessary S3 permissions:
Open role in IAM
In AWS Console, go to IAM › Roles and find your EC2 instance's existing role.
Attach S3 policy
Click on the role and go to the Permissions tab. Click Add permissions › Attach policies. Search for and select AmazonS3ReadOnlyAccess policy. Click Attach policies.
Alternative: Custom Inline Policy
For more granular control, you can create a custom inline policy:
Create inline policy
In the same role's Permissions tab, click Add permissions › Create inline policy. Switch to JSON and add this policy (replace your-source-bucket-name):
{
  "Version": "2012-10-17",
  "Statement": [
    {
      "Effect": "Allow",
      "Action": [
        "s3:GetObject",
        "s3:ListBucket"
      ],
      "Resource": [
        "arn:aws:s3:::your-source-bucket-name",
        "arn:aws:s3:::your-source-bucket-name/*"
      ]
    }
  ]
}
Name the policy (e.g., NegereFejS3Access) and click Create policy.
The connector will automatically detect and use the EC2 instance's IAM role for accessing your S3 buckets.
Credential Entry in Negere-Fej
When configuring the S3 connector in Negere-Fej, you'll need to:
Open Assume Role tab
Click on the Assume Role tab
No credentials required
No credentials need to be entered — the connector automatically uses your EC2 instance's attached role.
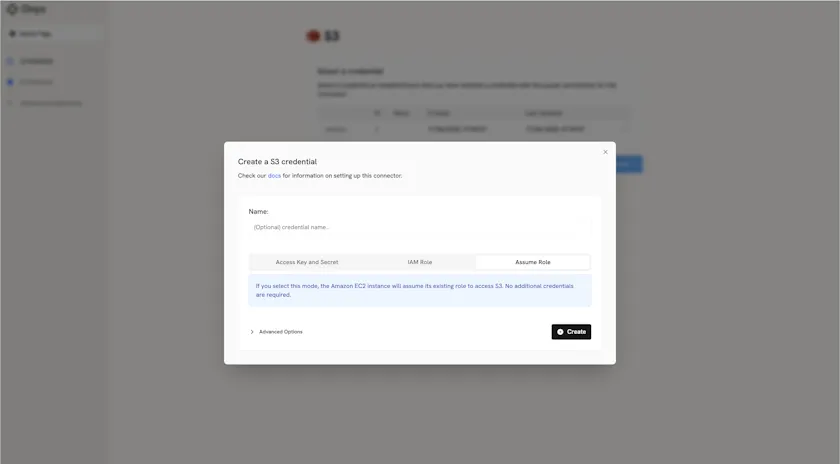
Screenshot of Negere-Fej S3 assume role configuration
Next Steps
Once you have updated your EC2 instance's role with S3 permissions, proceed to the indexing steps in the overview to configure your S3 connector.